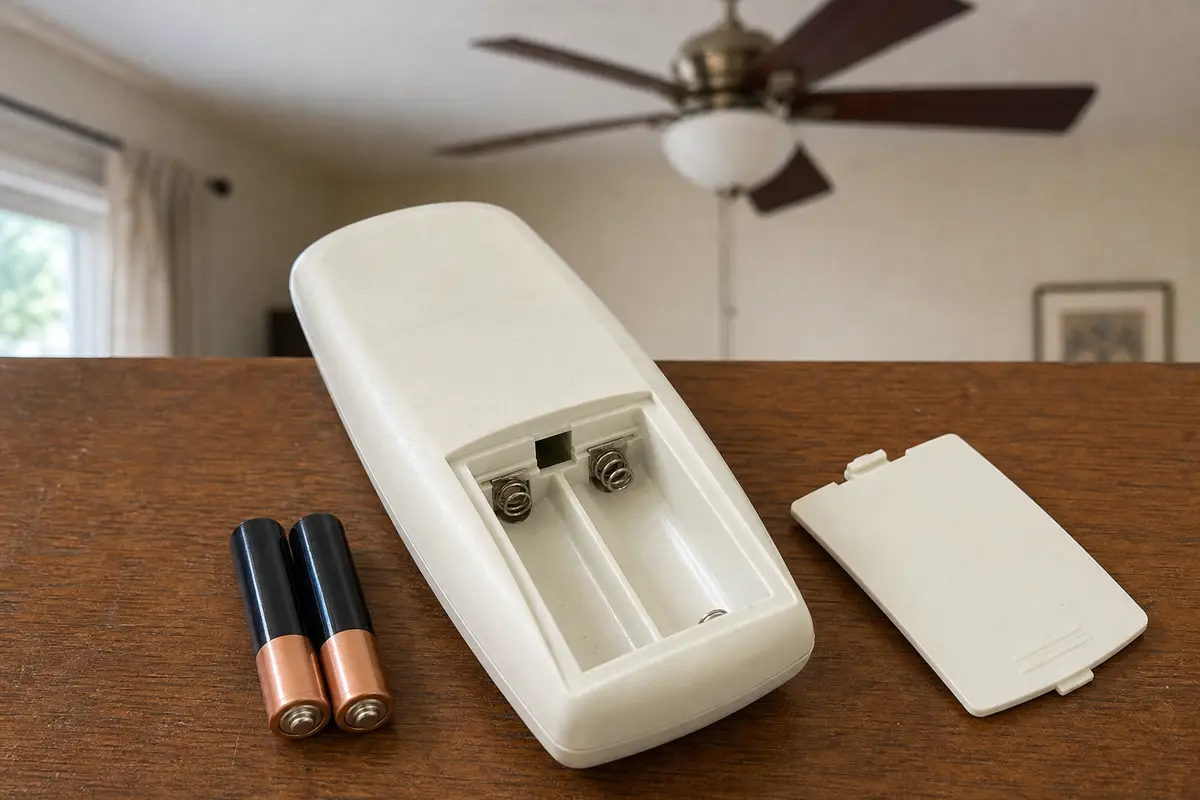
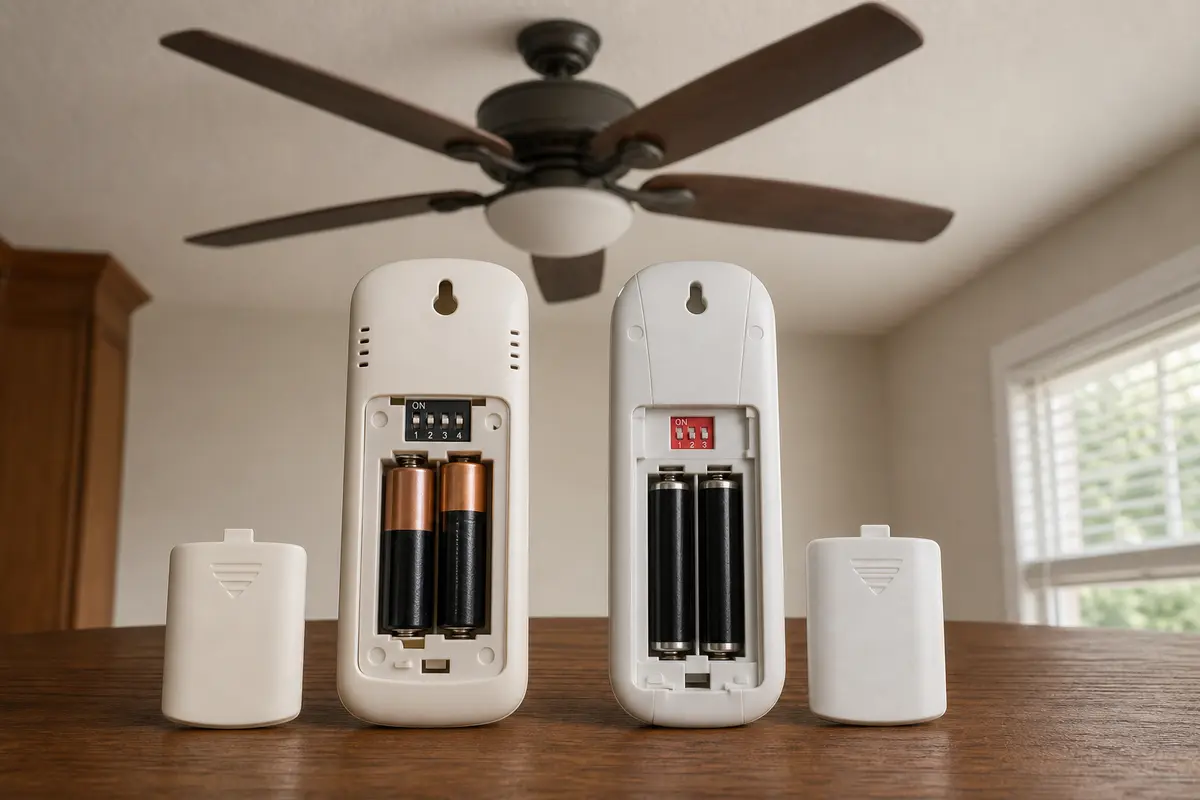
Open the battery compartment and check the printed battery type, plus and minus marks, model number, and any small DIP switches. Install a fresh battery, press the light, speed, reverse, and off buttons, then repeat the pairing steps in the fan manual. If another control works but the remote does nothing, match all of those details before buying.
Check the battery contacts for corrosion and watch for a stuck button or cracked case. Stop if every control is dead; that points to a power, receiver, or fan problem instead. Opening the ceiling canopy turns this into electrical work.
Before you start: Take a photo of the old remote, its model number, battery type, buttons, and any small switches inside the battery compartment. Pairing steps vary by fan, so use the fan manual rather than a generic online sequence.
Test each way the fan can be controlled. If only the handheld remote fails, stay with the battery, pairing, and remote checks. If everything is dead, look for a power or fan problem instead.
Handheld remote likely
Look for: A wall control or pull chain still runs the fan, but the remote fails after a fresh battery and the exact pairing sequence.
Next step: Match the fan and remote models, battery, functions, and pairing system before ordering.
Do not buy a remote yet
Look for: The fan is dead from the wall control, pull chain, and remote, or the breaker will not stay on.
Next step: Treat this as a power, receiver, motor, or wiring fault. A handheld remote is not the first repair.
Matched kit required
Look for: The manufacturer lists a remote-and-receiver kit for the exact AC/DC fan system and supported functions.
Next step: Receiver replacement enters line-voltage territory. Stop for an electrician when testing, labels, splices, or the exact diagram are unclear.
Check the remote before buying a replacement
Start with the battery compartment and the control-path split. Then compare the old and candidate remotes before buying; similar cases do not prove compatible electronics.
Use the battery size shown inside the remote and match the plus and minus marks. Try a fresh battery before replacing anything.Compare the remote model, battery system, functions, and pairing style. Different switch layouts are a compatibility warning, not a setup guess.
Safety first
Use a stable ladder or step stool on a flat surface.
Turn off power at the breaker before opening the fan canopy or touching wiring.
A non-contact voltage tester is only a preliminary check; verify de-energization with an appropriate method before touching conductors.
Never bypass the receiver, guess from wire colors, or energize the fan with the canopy open.
Do not force wires or overpack the canopy when reinstalling a receiver.
Stop and call a professional if the wiring is unclear, damaged, or does not match the replacement instructions.
Tools you may need
Step stool or ladder — To safely reach the fan canopy or receiver area if pairing switches or a receiver must be checked.
Phillips screwdriver — To remove the battery cover, canopy screws, or receiver cover if needed.
Fresh batteries — To rule out a dead battery and power the new remote during setup.
Non contact voltage tester — For a preliminary power check if the exact instructions require canopy access. It is not proof by itself that every conductor is de-energized.
Phone camera — To photograph dip switch positions, wire connections, and labels before changing anything.
Step-by-step fix
Step 1: Confirm the remote is the problem
Turn the wall switch for the fan on and make sure any pull chains are set to an operating position.
Install fresh batteries in the old remote and try the fan light, fan speed, and off buttons from a normal distance.
Use the battery size and polarity printed for that remote; do not substitute a different cell because it fits loosely.
Check the battery slot for a tab, bent spring contact, green or white corrosion, stuck button, or cracked cover.
Photograph the model number and the number and position of any DIP switches before changing them.
If your fan has a reverse switch on the housing, leave it fully in one position and test the remote again.
If the fan works from pull chains or wall controls but not from the remote, note which remote buttons fail; one dead button differs from a completely dead transmitter.
If it works: You have ruled out simple battery or switch issues and narrowed the problem to the remote system.
If it doesn’t: If the fan does not work at all from any control, the problem may be power, the receiver, the wall control, or the fan itself rather than the remote alone.
Stop if:
The wall switch or fan housing feels hot, smells burnt, or crackles.
You see damaged wiring, melted plastic, or heavy corrosion.
Step 2: Match the replacement remote
Find the fan model in its manual or on an accessible housing label; do not open the canopy just to shop for a remote.
Compare the old remote model, battery type, button functions, switch or learn-button system, and any receiver part number with the candidate replacement.
Compare fan speeds, light on/off, dimming, reverse, timer, and any seasonal mode one by one; missing functions mean the remote is not an equivalent match.
Confirm whether the fan uses an AC motor, DC motor, integrated control, separate receiver, or proprietary wall control.
Choose the exact fan-listed remote when possible. Use a remote-and-receiver kit only when its instructions explicitly support the fan type and every required function.
If it works: You have a replacement remote that matches the fan's control system closely enough to install and pair.
If it doesn’t: If you cannot confirm compatibility, pause before opening the fan. Ordering the wrong remote is common and can waste time.
Stop if:
The replacement instructions conflict with how your fan is currently set up.
The fan appears to use a proprietary wall control or smart module you cannot identify.
Step 3: Shut off power if you need to access the canopy or receiver
If your replacement only needs batteries and pairing, you may not need to open the fan canopy yet.
If you need to check dip switches, inspect the receiver, or replace a receiver that came with the remote, turn off power at the breaker first.
Use a non-contact voltage tester before touching any wires or terminals inside the canopy.
Set up your ladder on a flat surface and keep one hand free while removing screws or covers.
If it works: The fan is safe to inspect if canopy access is required.
If it doesn’t: If you cannot confidently confirm power is off, do not open the canopy. Use only the battery and pairing steps or call an electrician.
Stop if:
The ceiling box, bracket, or fan mounting feels loose.
You find multiple wire splices or connections that do not match the replacement instructions clearly.
Step 4: Set up the new remote and matching settings
Confirm the battery size and polarity shown inside the new remote, then install a fresh matching set.
Record the fan model, old remote model, button functions, and whether the control uses switches, a learn button, or an integrated smart module.
If both matched controls use code switches, photograph the old positions and reproduce that exact code only as the manufacturer instructs.
If the system uses electronic pairing, follow the exact fan or kit power-cycle and button sequence. Pairing windows differ by model.
Test fan off, each supported speed, light, dimming, and reverse only if those functions appear in the exact fan instructions.
If it works: The new remote is powered and configured to communicate with the fan system.
If it doesn’t: If the remote will not pair, double-check battery orientation, switch positions, and whether the wall switch is on during pairing.
Stop if:
The receiver cover will not close because wires are pinched or crowded.
Any wire insulation is nicked, brittle, or loose.
Step 5: Replace the receiver only if your kit requires it
Only do this step if your replacement kit includes a receiver and the instructions say the old receiver must be changed.
With power off, lower the canopy carefully and photograph the existing receiver wiring before disconnecting anything.
For keyed plug-in harnesses, use only the matching connectors shown in the exact fan instructions and never force a plug.
For hardwired receivers, stop for a licensed electrician unless the exact wiring diagram, test method, and every labeled connection are clear. Do not rely on wire color.
Close and secure the canopy with no pinched insulation before restoring power.
If it works: The new receiver is installed neatly and the canopy is back in place.
If it doesn’t: If the wiring does not match clearly or there are extra wires you cannot identify, stop and get qualified help.
Stop if:
Wire colors or labels do not line up between the fan, ceiling supply, and new receiver.
You are unsure which wires are line, load, neutral, or fan/light outputs.
Step 6: Restore power and test every function
Turn the breaker back on and switch the wall control on.
Confirm the canopy is closed and secure before power is restored; never test with line-voltage wiring exposed.
Test light on and off, fan off, and each available speed on the new remote.
Stand in different spots in the room to confirm the signal works reliably.
If the fan responds incorrectly, repeat the pairing process or recheck the dip switch settings.
Keep the old remote until you are sure the new one works consistently.
If only one function fails, compare that function against the exact compatibility list before repeating setup or buying a receiver.
If it works: The new ceiling fan remote control operates the fan and light normally.
If it doesn’t: If the fan still does not respond, the receiver, wall control, or fan electronics may be the real problem.
Stop if:
The fan starts on its own, behaves unpredictably, or only works intermittently after installation.
The light flickers badly or the fan hums loudly after a receiver change.
Verify the repair
The wall switch is on and the new remote has fresh batteries.
The remote controls the light and all fan speeds correctly.
Any dip switches or pairing steps match between the remote and receiver.
The canopy is secure and no wires are pinched.
The fan runs normally without unusual humming, flickering, or random operation.
FAQ
Can I replace only the handheld remote?
Sometimes. If your fan uses a separate receiver that is still compatible, a handheld remote alone may work. If the new remote will not pair with the existing receiver, you may need a matched remote-and-receiver kit.
How do I know if my ceiling fan uses a receiver?
Many remote-controlled fans have a small receiver tucked in the canopy above the fan. If the fan has always used a handheld remote and no wall speed control, it likely has a receiver.
Why does the new remote not work even with fresh batteries?
Common causes are wrong compatibility, unmatched dip switch settings, an unpaired remote, a bad receiver, or a wall switch that is off. Recheck the setup before assuming the new remote is defective.
Do I need to turn off the breaker just to change the remote batteries?
No. You only need the breaker off if you are opening the canopy, checking the receiver, or handling any wiring.
Can I use a universal ceiling fan remote control?
Sometimes, but not always. Universal kits can work well when they are compatible with your fan's motor and light control setup. Match the replacement carefully before ordering.
Official references and related diagnosis
Use the exact fan instructions for pairing and compatibility. If another control works, stay on the remote path; if every control is dead, diagnose power or the fan system first.