How to Replace a Frost Free Hose Bib Vacuum Breaker
Direct answer: To replace a frost free hose bib vacuum breaker, first confirm the leak or spray is coming from the anti-siphon cap at the top of the faucet, then remove the old vacuum breaker, install the matching replacement, and test the faucet under normal use.
This is usually a manageable homeowner repair when the hose bib body is still sound and the problem is limited to the vacuum breaker. Work gently so you do not damage the faucet body or stem.
Before you start: Confirm the leak is from the top vacuum breaker, remove the hose, and isolate the water supply if the faucet will not shut off. Stop if the faucet body is cracked, loose at the wall, leaking inside the siding, or too corroded to hold the new cap.
Last reviewed: 2026-06-15
Make sure this is the right repair
Before you order a vacuum breaker, make sure the faucet body is still worth repairing. A small top-cap leak is a different job than a cracked sillcock or water leaking inside the wall.
This page fits
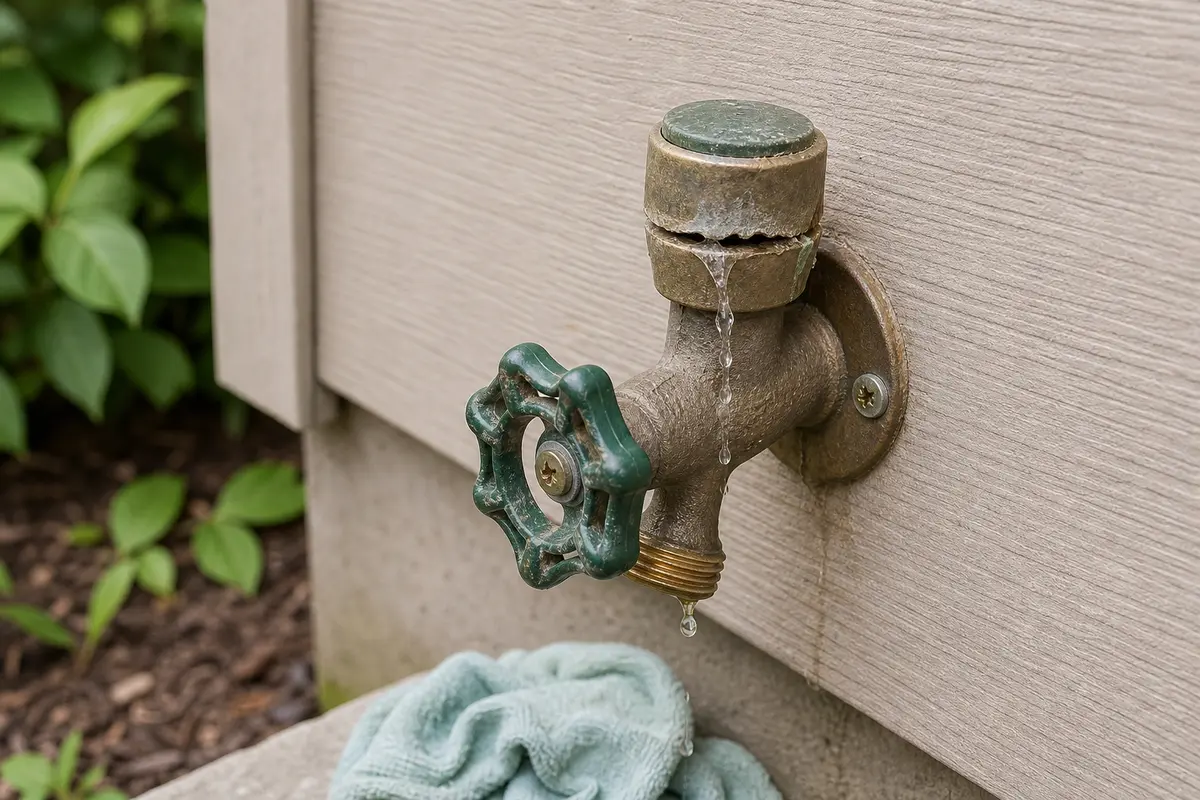
This page fits when: Water sprays, bubbles, or drips from the top anti-siphon cap while the hose bib runs or right after you shut it off, and the faucet body is still solid.
Check something else when: Remove any hose, timer, splitter, or nozzle first. Backpressure from an attachment can make the vacuum breaker spit water even when the faucet itself is not the main failure.
Confirm the fit first
This page fits when: The replacement matches the faucet brand or style, cap diameter, thread pattern, retaining screw or clip, and vent design.
Check something else when: If the old cap is missing, look for the faucet brand on the handle, body, or wall flange before ordering. Universal vacuum breakers still need to match the mounting style.
Stop for hidden damage
This page fits when: The top mounting threads are intact, the hose bib is tight to the wall, and the faucet shuts off cleanly enough to work on it.
Check something else when: Stop if the body is cracked, the faucet twists in the wall, water appears behind the siding, or the shutoff will not hold. Those problems can turn this into a hose bib replacement.
Check the failure point and dry-fit before fastening
Use the leak location and a dry-fit check to confirm the vacuum breaker cap is the piece to replace. The new cap should match the old style and sit squarely without forcing the faucet body.
Confirm the leak is coming from the top anti-siphon cap, not the handle packing, spout threads, or wall penetration.Dry-fit the replacement by hand first. If the cap starts crooked or the retaining screw does not line up, stop and match the vacuum breaker again.
Safety first
Wear eye protection if you are prying out a clip or working under mineral scale that can snap loose.
Remove hoses, timers, and spray nozzles before diagnosing so trapped pressure does not surprise you.
Use pliers gently on the old cap and avoid twisting against the faucet body.
If the faucet will not shut off, stop and isolate the water supply before disassembly.
Tools you may need
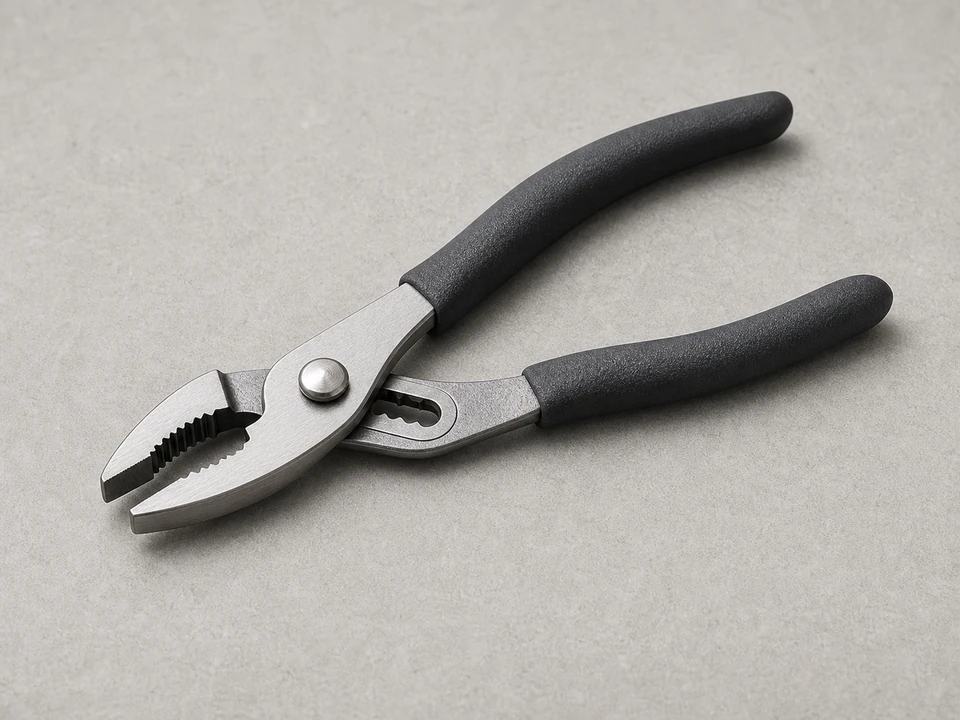
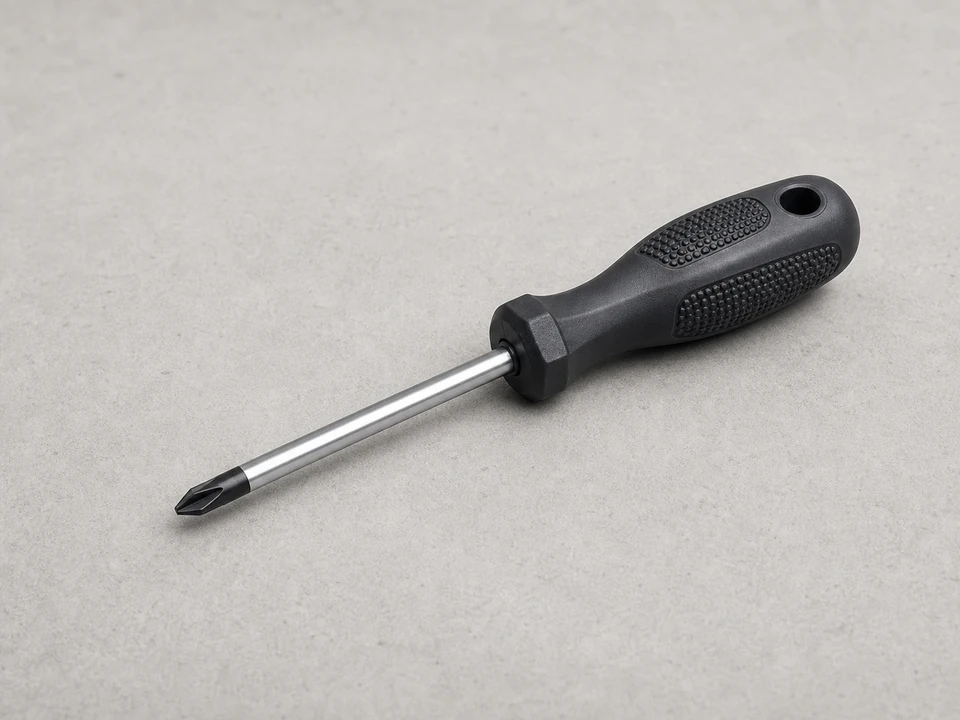
Slip joint pliers
Use it for: To loosen the old vacuum breaker cap or hold the retaining hardware without rounding it off.
As an Amazon Associate I earn from qualifying purchases. Repair Riot may earn a commission at no extra cost to you.
Step-by-step fix
Step 1: Confirm the vacuum breaker is the problem
Turn the hose bib on and watch the top anti-siphon cap area, not just the spout.
Look for water spraying, dripping, or bubbling from the vacuum breaker vents when the faucet is running or when you shut it off.
Remove any hose, splitter, timer, or nozzle from the spout so backpressure from an attachment does not confuse the diagnosis.
Check the faucet body and wall area for cracks, looseness, or leaking that starts behind the handle or inside the wall instead of at the vacuum breaker.
If it works: You have confirmed the leak or spray is coming from the vacuum breaker assembly on top of the frost free hose bib.
If it doesn’t: If water is leaking from the stem, packing nut, spout connection, or inside the wall, this is a different repair path than replacing the vacuum breaker.
Stop if:
The faucet body is cracked, badly corroded, or loose at the wall.
Water appears to be leaking from inside the wall or siding penetration.
The hose bib is damaged beyond the vacuum breaker cap area.
Step 2: Shut the faucet off and prep the work area
Turn the hose bib fully off.
If the faucet does not shut off cleanly and keeps running, shut off the water supply feeding that hose bib before you continue.
Place a rag under the faucet top to catch drips, the retaining screw, or a small clip if it drops.
Brush off dirt, paint, and mineral buildup around the vacuum breaker so you can see whether it uses threads, a screw, or a retaining clip.
Check that the faucet body stays still when you touch the cap. If the whole hose bib moves in the wall, stop before twisting on it.
If it works: The faucet is off, the area is clean enough to work on, and you can see the vacuum breaker clearly.
If it doesn’t: If buildup is hiding the retaining clip or screw, clean a little more before forcing anything.
Stop if:
The shutoff will not hold and water continues flowing strongly.
The retaining area is so corroded that cap pieces are breaking apart into the faucet body.
Step 3: Remove the old vacuum breaker
Look for the way the vacuum breaker is held in place. Common styles use a small screw, a retaining clip, or a threaded cap.
Remove the retaining screw or clip if your faucet has one. Keep the hardware together so you can compare it to the replacement.
If the vacuum breaker is threaded, use pliers carefully on the old cap only and turn it counterclockwise to remove it.
If the cap is stuck from mineral buildup, work it back and forth gently instead of twisting hard against the faucet body.
Lift off the old vacuum breaker pieces and note their order so the new one goes on the same way.
If it works: The old vacuum breaker is off and the faucet body threads or mounting area are intact.
If it doesn’t: If the old cap breaks during removal, pick out the remaining loose pieces carefully and compare the exposed mounting area to your replacement before continuing.
Stop if:
The faucet body threads crack, deform, or start turning with the vacuum breaker.
A broken retaining screw is stuck in the faucet body and blocks installation of the new vacuum breaker.
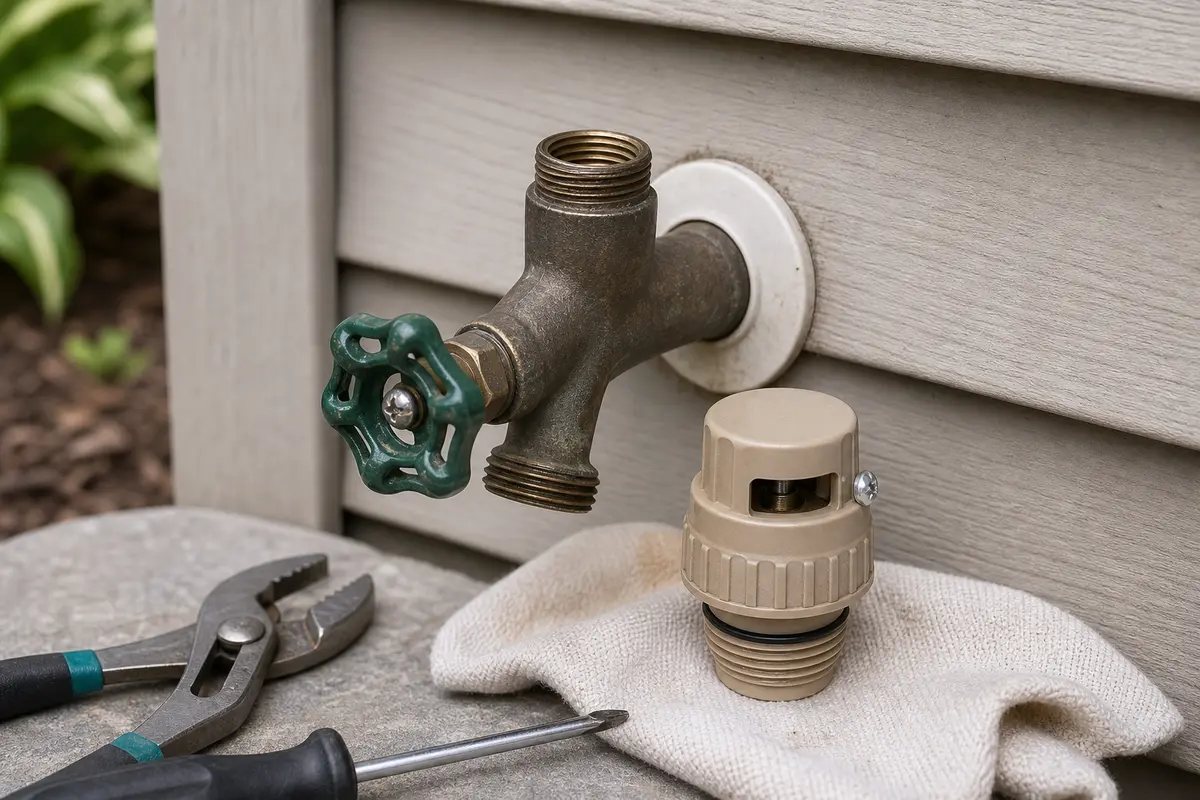
Step 4: Clean and compare before installing the new vacuum breaker
Wipe the mounting area clean with a rag.
Use the brush to remove scale, grit, and old debris from the threads, vent openings, or sealing surfaces.
Compare the new vacuum breaker to the old one for overall style, diameter, thread pattern, and retaining method.
Dry-fit the new vacuum breaker by hand to make sure it starts straight and does not cross-thread.
If it works: The mounting area is clean and the new vacuum breaker matches the old one closely enough to install by hand.
If it doesn’t: If the new vacuum breaker does not match the old cap in size or attachment style, stop and get the correct replacement rather than forcing it.
Stop if:
The faucet mounting area is too damaged or worn to hold the new vacuum breaker securely.
Step 5: Install the new vacuum breaker
Set the new vacuum breaker in place in the same orientation as the old one.
Thread it on by hand first if it is a threaded style. Tighten only until snug and properly seated.
Reinstall the retaining clip or screw if your faucet uses one.
Do not overtighten. The vacuum breaker is a small assembly and too much force can crack it or damage the faucet body.
Wipe the area dry so you can spot fresh leaks during testing.
If it works: The new vacuum breaker is seated squarely, secured properly, and the area is dry for testing.
If it doesn’t: If the replacement cap will not seat flat or the threads feel rough immediately, remove it and restart by hand to avoid cross-threading.
Stop if:
The new vacuum breaker cracks, will not tighten, or will not stay retained because the faucet body is damaged.
Step 6: Test the repair in real use
Turn the water supply back on if you shut it off earlier.
Open the hose bib slowly and watch the vacuum breaker area as pressure builds.
Let the faucet run for a minute, then shut it off and watch for drips, spray, or seepage from the vacuum breaker vents.
Reconnect a basic garden hose and run water again to confirm the repair holds during normal use.
Check the wall area and underside of the faucet one more time so you do not miss a separate leak.
If it works: The hose bib runs and shuts off without leaking or spraying from the new vacuum breaker, and the repair holds during normal use.
If it doesn’t: If the vacuum breaker still leaks with the correct replacement installed, the faucet may have a deeper body or stem problem and may need a full hose bib repair or replacement.
Stop if:
Water is now leaking from inside the wall, around the faucet body, or from a crack in the casting.
The new vacuum breaker repeatedly leaks because the faucet itself is damaged or incompatible with the replacement.
Match the faucet brand or style, cap diameter, thread pattern, retaining screw or clip, and vent design before ordering.
As an Amazon Associate I earn from qualifying purchases. Repair Riot may earn a commission at no extra cost to you.
Verify the repair
Run the hose bib with no hose attached and confirm no water escapes from the vacuum breaker body.
Shut the faucet off and watch for at least a minute to make sure drips do not return.
Reconnect a hose and test again under normal flow.
Check that the new vacuum breaker stays secure and does not loosen when the faucet is used.
FAQ
What does the vacuum breaker do on a frost free hose bib?
It helps prevent contaminated water from being pulled back into the plumbing system. It also vents at the top of the faucet, which is why a failed one often leaks or sprays there.
Can I replace just the vacuum breaker instead of the whole hose bib?
Yes, if the faucet body is in good shape and the leak is clearly coming from the vacuum breaker assembly. If the body is cracked, loose, or leaking inside the wall, replacing only the vacuum breaker will not solve it.
Why does water come out of the top of the hose bib when I turn it on?
That usually points to a worn, cracked, clogged, or stuck vacuum breaker. It can also happen if the wrong replacement is installed or if the faucet body is damaged where the vacuum breaker mounts.
Do I need to shut off the house water to replace the vacuum breaker?
Not always. If the hose bib shuts off fully, you can usually replace the vacuum breaker with the faucet off. If the faucet will not stop flowing, shut off the supply feeding that line before taking anything apart.
Can I use thread tape on the new vacuum breaker?
Usually no unless the replacement instructions specifically call for it. Most vacuum breakers are designed to fit their mounting surfaces directly, and extra tape can interfere with proper seating.
Sources and reference notes
Repair Riot keeps this hose-bib guide focused on visible vacuum-breaker leaks, matching the replacement cap, and stop points for hidden wall leaks or damaged faucet bodies.