Does the lever feel rock-hard before it moves?
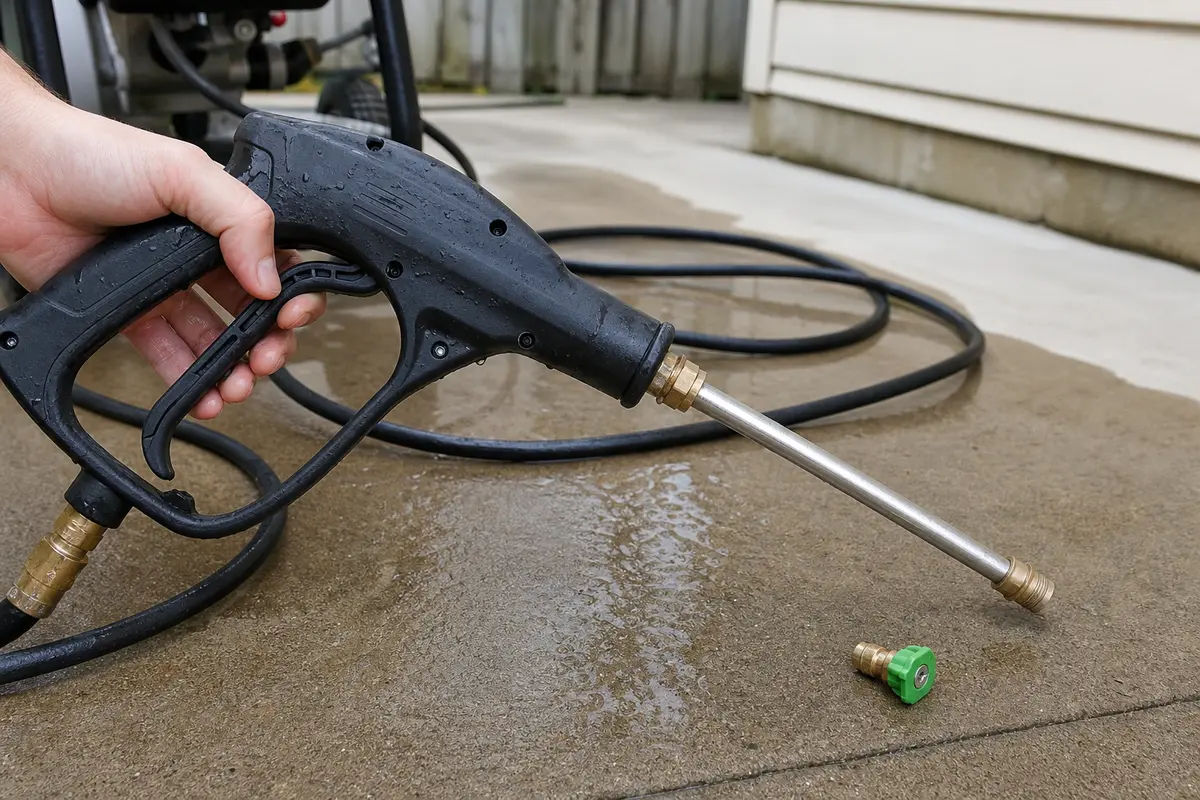
Work the safety lock fully open, shut the machine down, remove the spray tip, and bleed pressure before judging the gun.
Direct answer: Start with the safety lock, trapped pressure, and nozzle. If the lever frees up after bleeding the hose or removing the tip, stay on the outlet side; if it still binds with no pressure, inspect the gun.
Most likely: A good clue is how it behaves with no pressure on it. When the lever frees up after bleeding the hose, the gun probably is not broken.
Sort it by feel: rock-hard lever, normal trigger with no spray, or gritty trigger that will not return.
Don’t start with: Do not force the lever or order a pump first. If the trigger is rock-hard, work the lock fully open, remove the tip with the machine off, and bleed pressure before you blame parts.
Work the safety lock fully open, shut the machine down, remove the spray tip, and bleed pressure before judging the gun.
Stay on the outlet side first: spray tip, wand end, garden hose, spigot, and inlet screen.
The gun is passing water. Clean or replace the spray tip and inspect the wand connection before buying a trigger gun.
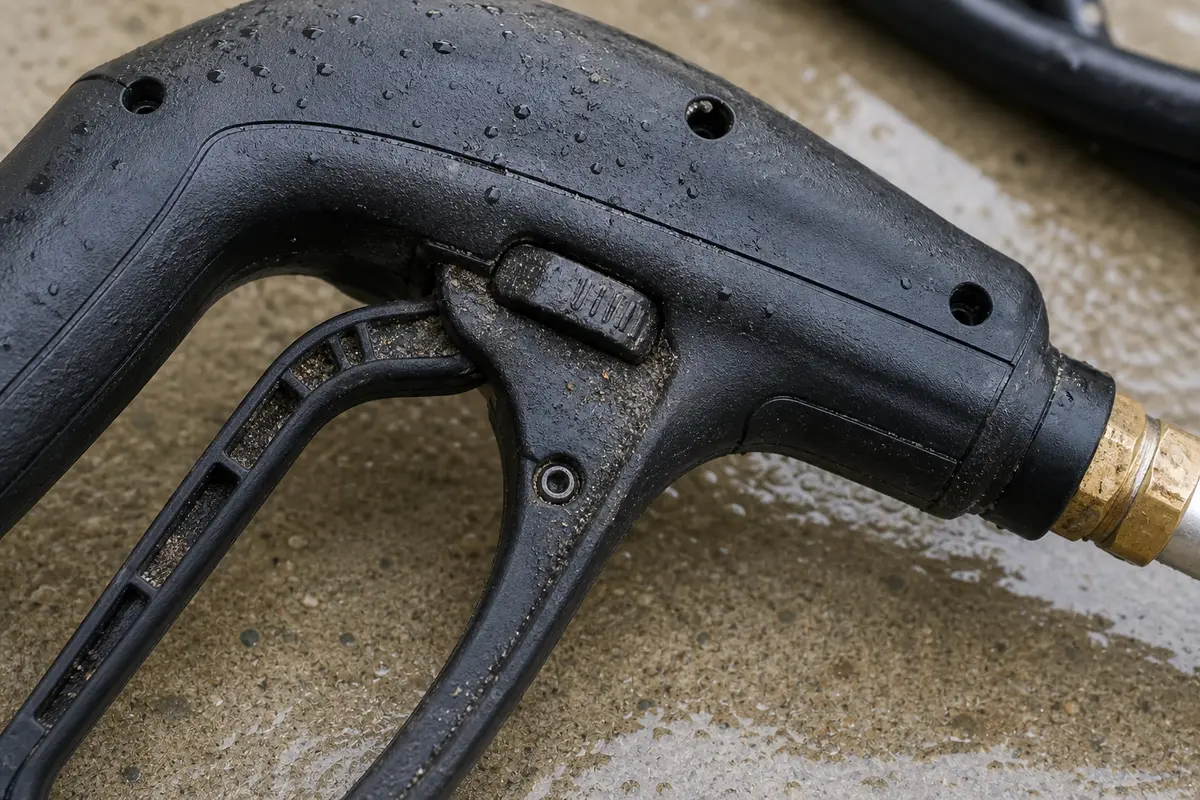
Look for grit, mineral buildup, a cracked pivot, or a weak return spring in the trigger gun.
Stop using it. A trigger gun that cannot shut off reliably should be replaced, not forced back into service.
The useful visual clues are simple: nozzle off, trigger pointed safely down, and the pivot area clean enough to see cracks, grit, or a bad return.
Before you buy a trigger gun, nozzle set, or wand, prove which piece failed. Match the washer model, hose connection, wand connection, pressure rating, and flow range. A lookalike gun can leak, refuse to latch, or overload the wrong setup.
Most of the time, this is a gun-side or outlet-side fault, not a pump failure. A rock-hard lever, weak flow with the tip out, or gritty return tells you which check gets the next minute.
The wrong move is forcing the lever until the plastic housing cracks. A pressure-bound gun can feel broken even when the repair is just bleeding pressure or cleaning the outlet path.
This first check is simple and it protects the gun. Watch what changes after the machine is off, the water is off, and the nozzle is out.
| What you see | What it usually means | Next move |
|---|---|---|
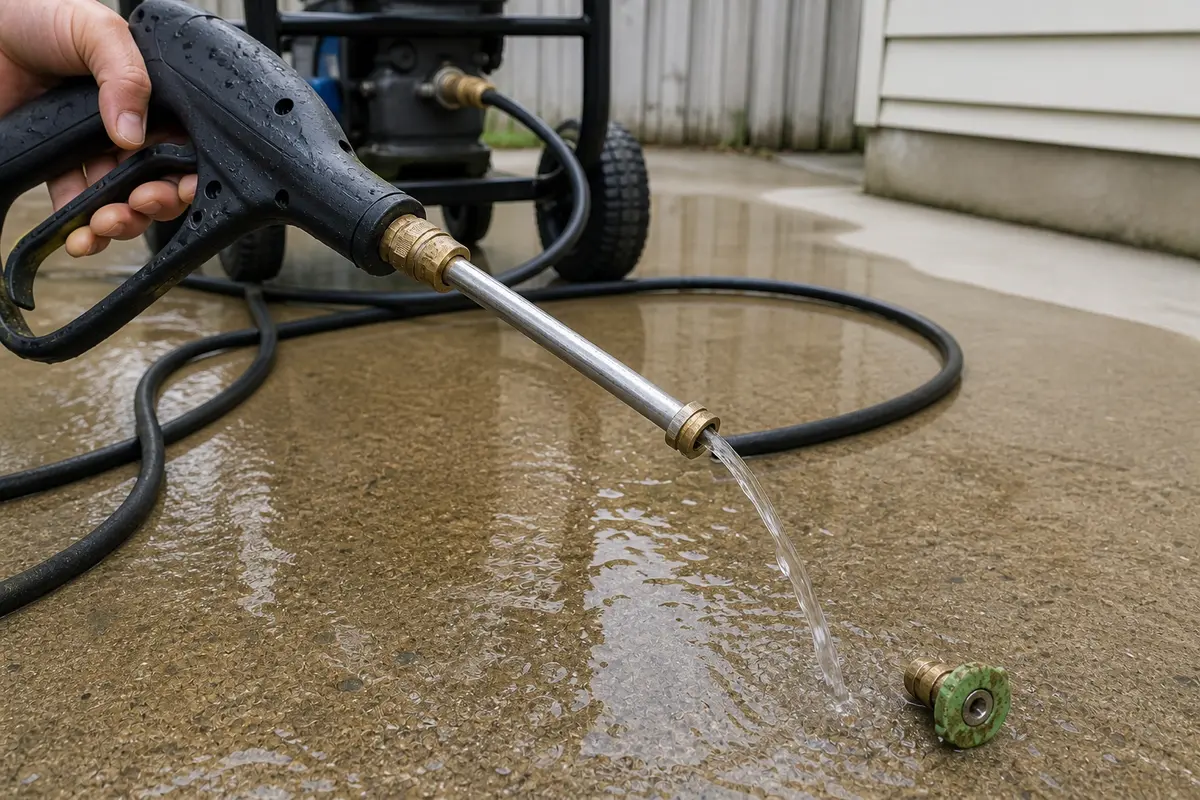
| Lever frees up and water flows with the tip removed. | Trapped pressure or a blocked tip was holding the gun loaded. | Clean or replace the tip, then run a few short spray bursts. |
| Lever moves, but water only dribbles from the bare wand. | Water supply, inlet screen, hose, or wand path is restricted. | Fix the flow restriction before blaming the trigger gun. |
| Lever stays gritty or crooked with no pressure on it. | The trigger gun is binding mechanically. | Inspect the pivot, lock tab, body seam, and return action. |
| Gun leaks from the body seam or will not stop spray. | The trigger gun is no longer a reliable shutoff. | Replace the gun assembly and stop using the damaged one. |
A trigger that moves normally but will not spray needs a water-path check. The gun cannot pass what the hose, inlet, wand, or tip will not feed.
Once pressure, nozzle, and water supply are cleared, the gun earns attention. Look for damage you can see and feel, not just a trigger that annoyed you once.
These tools are for outside-the-gun checks only. They help you see, clean, and handle fittings without prying open a sealed trigger body.
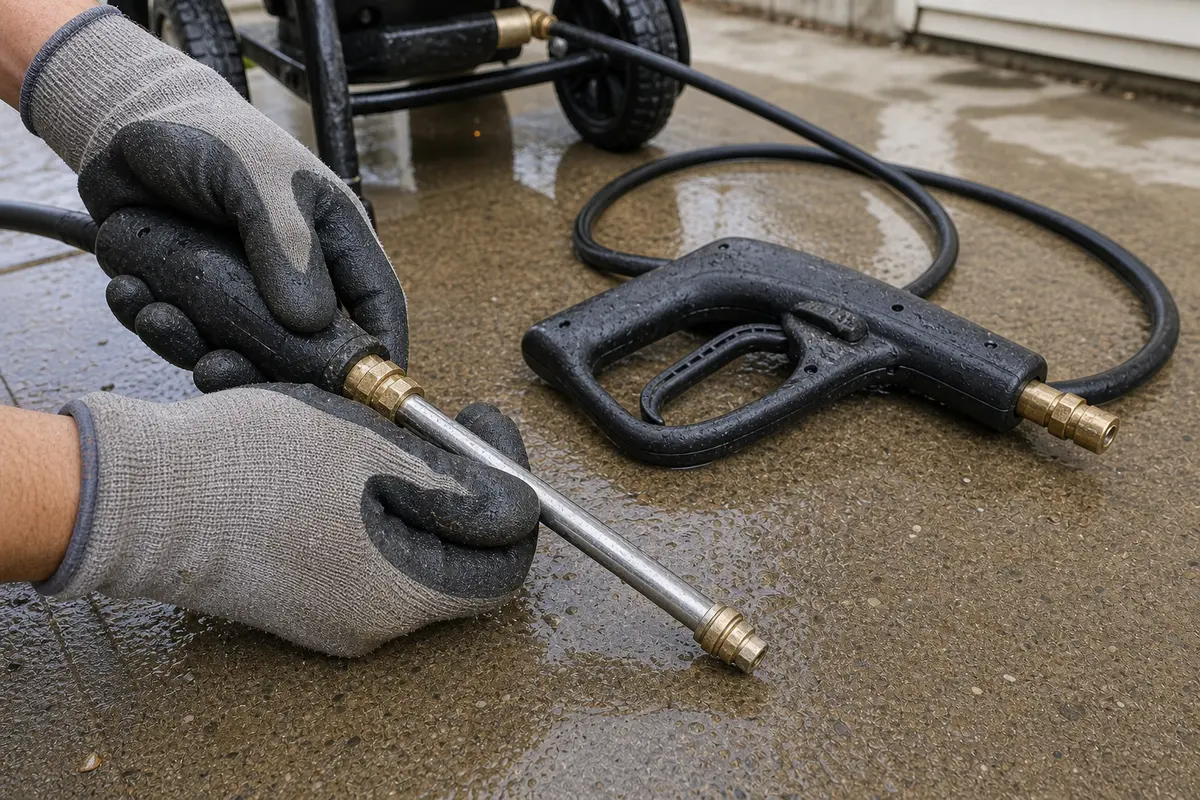
Helps when: The wand, hose fittings, and quick-connects are wet and gritty, and gloves help you keep control while pointing the gun safely down.
Skip it when: Skip them only if the gun is dry, depressurized, and you can handle the fittings without slipping.
Compare work gloves on Amazon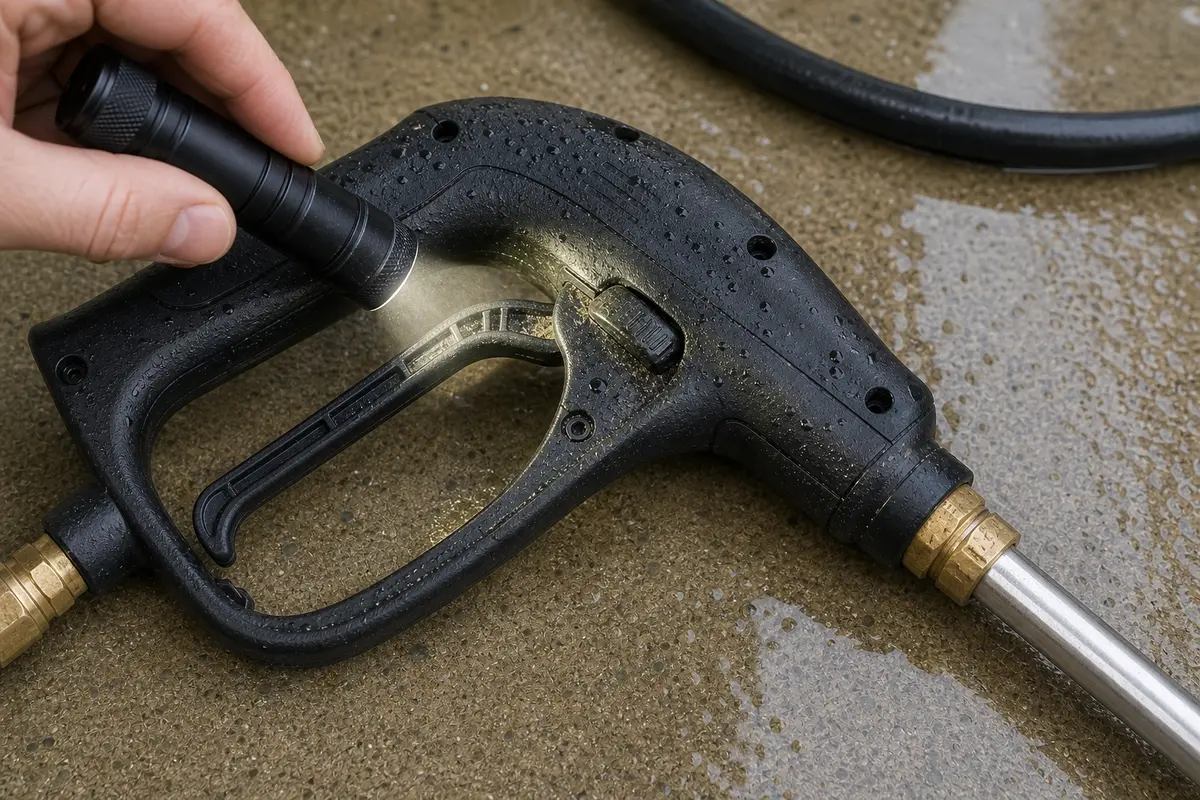
Helps when: A flashlight makes cracks, sand in the pivot, and fresh water tracks easier to see around the trigger opening and body seam.
Skip it when: Skip it if daylight is strong enough to inspect the pivot and lock tab without guessing.
Compare flashlights on Amazon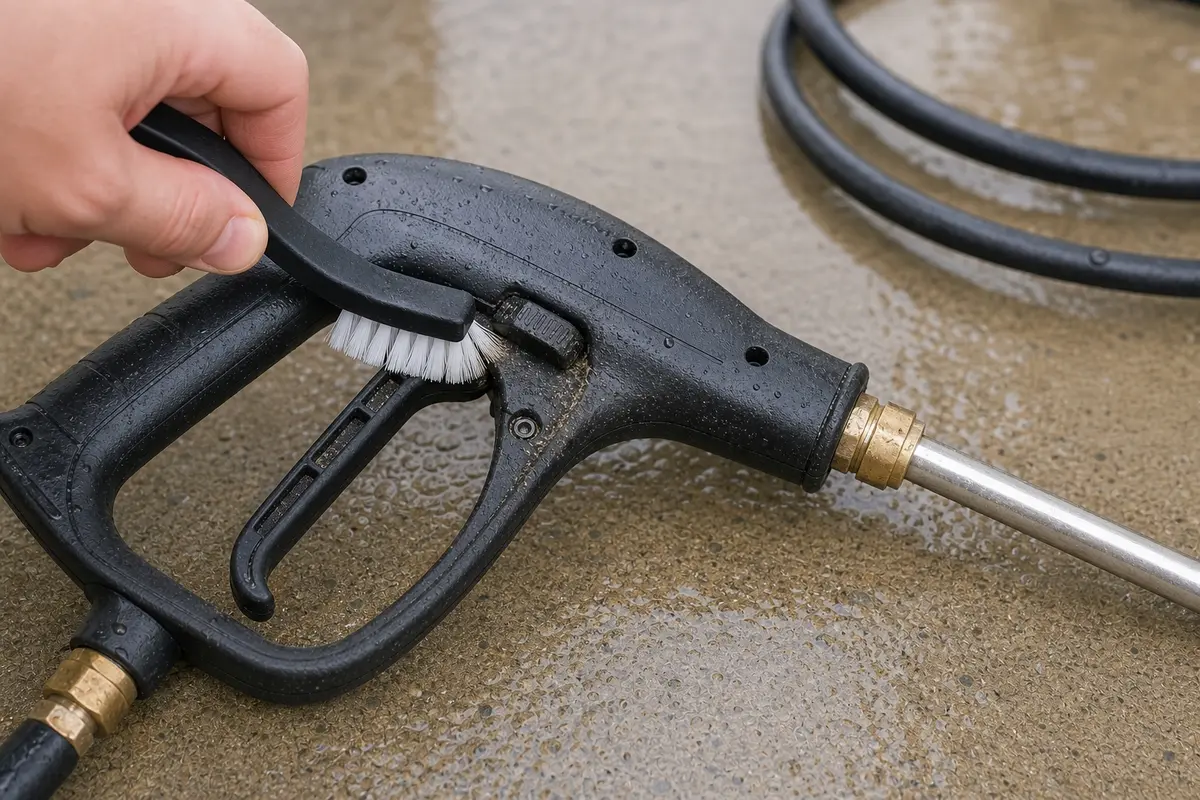
Helps when: A brush clears dried dirt from the trigger area and quick-connects without gouging the plastic or packing grit deeper into the gun.
Skip it when: Skip it if the trigger gun is cracked, leaking, or already binding with no visible grit to remove.
Compare nylon brushes on Amazon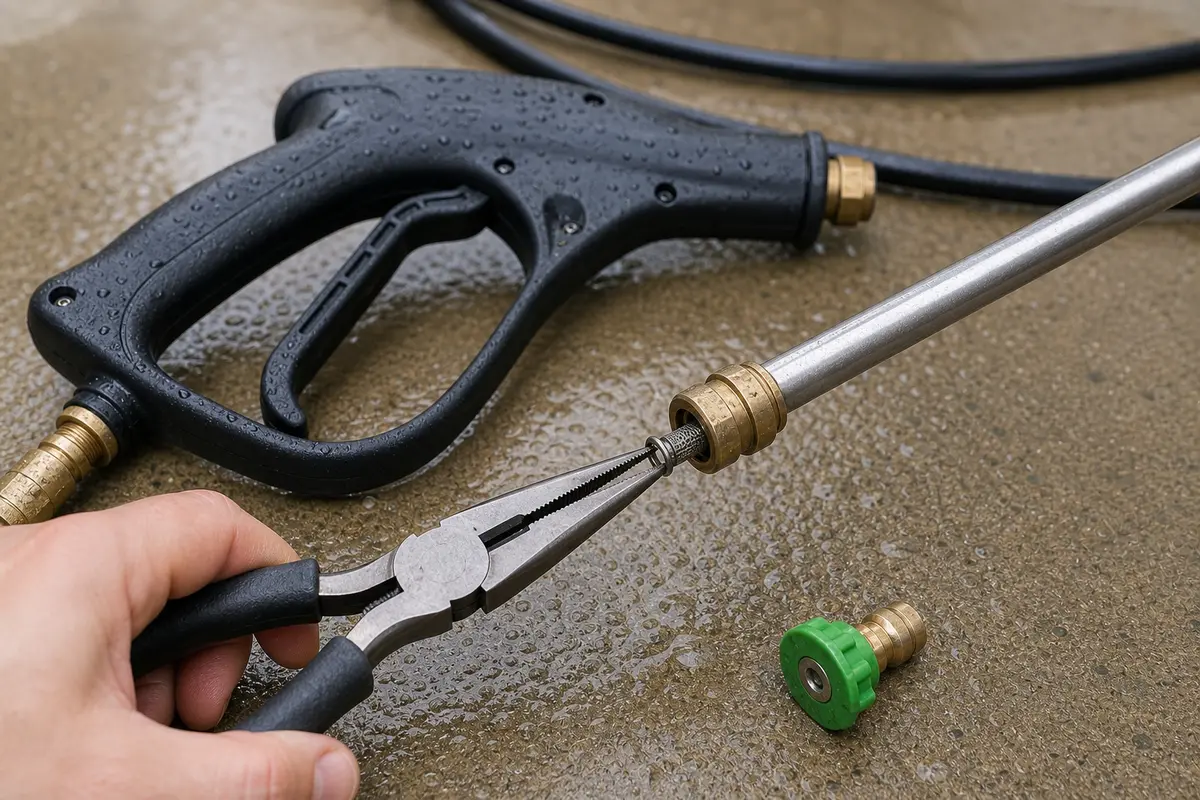
Helps when: They help pull a stuck nozzle, clip, or inlet screen gently when fingers cannot grip it.
Skip it when: Skip them if using pliers would twist the wand, crush a quick-connect, or force a stuck trigger.
Compare needle-nose pliers on AmazonAs an Amazon Associate I earn from qualifying purchases. Repair Riot may earn a commission at no extra cost to you.
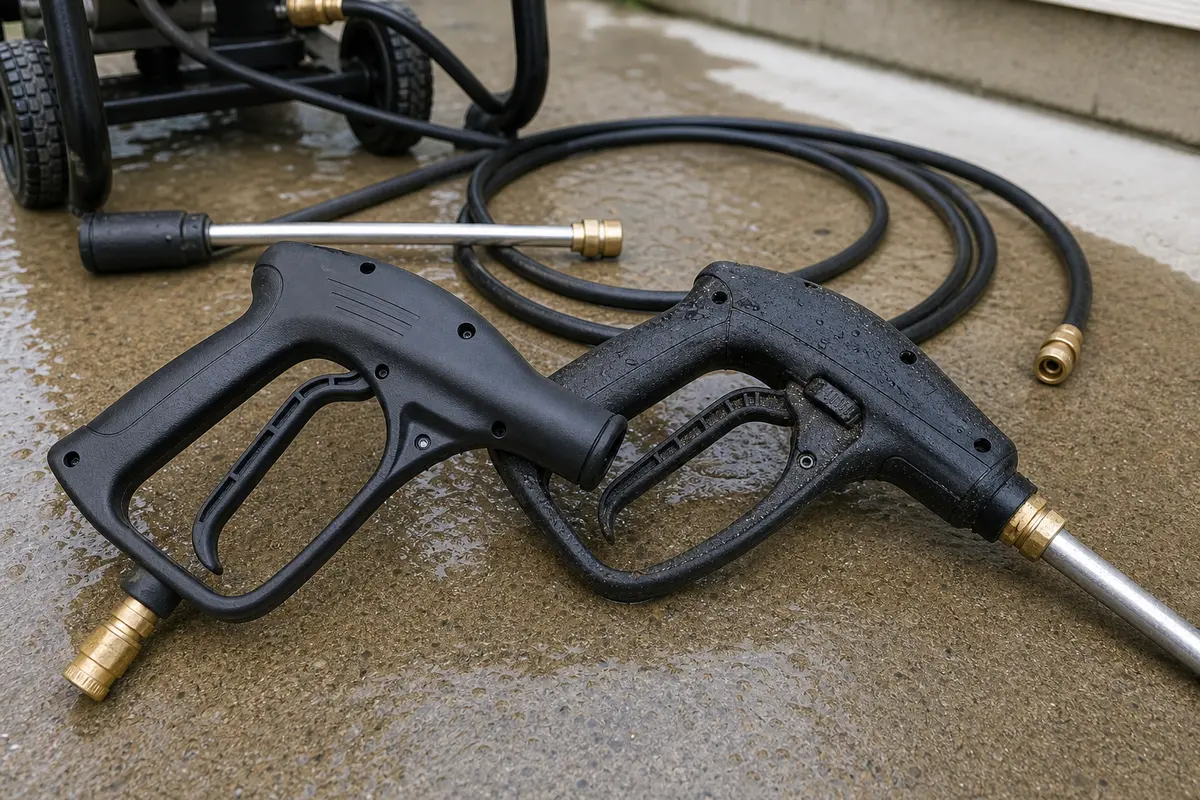
Compare parts only after the result points there. Trigger guns, nozzle tips, and wands are not universal, even when the online photo looks close.
Helps when: The trigger still binds with no pressure on it, will not return, leaks from the body seam, or has cracks around the pivot or lock tab.
Skip it when: Skip it when the gun passes water with the nozzle removed and the bad behavior follows one dirty or damaged spray tip.
Compare trigger guns on Amazon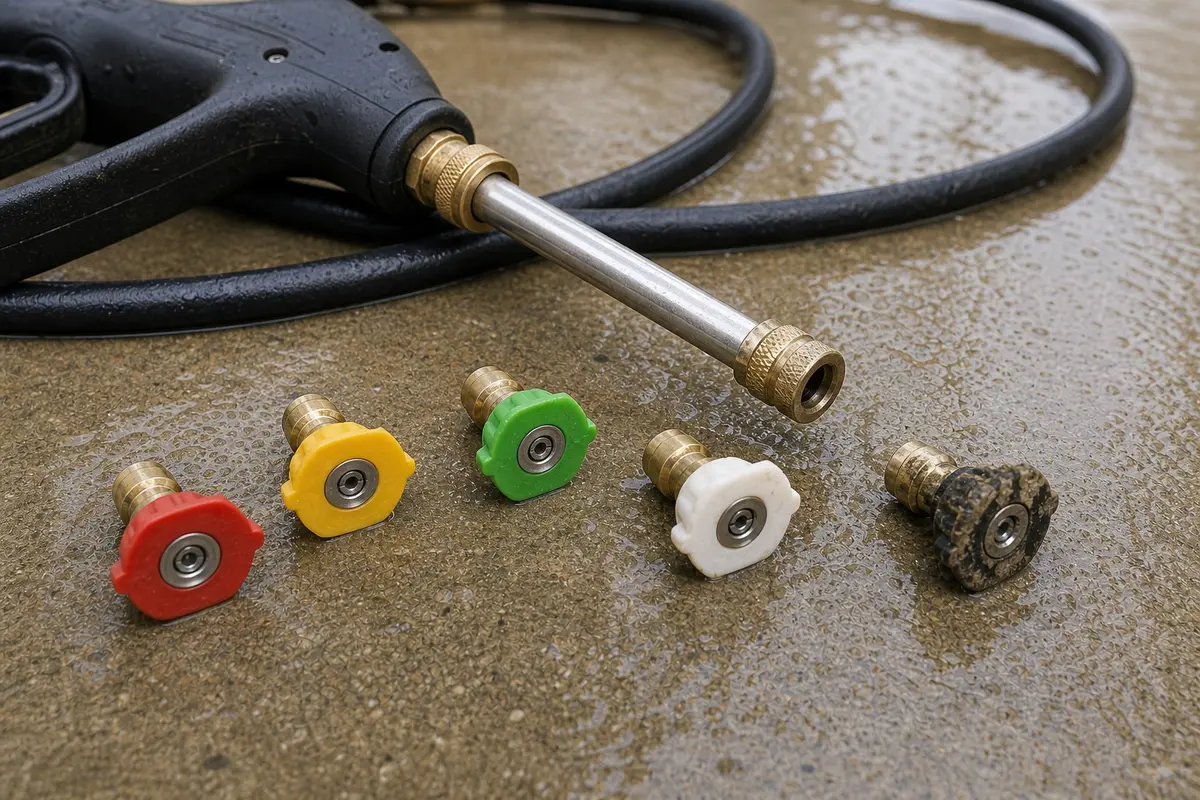
Helps when: The trigger works bare, then spray fails when that tip is installed.
Skip it when: Skip them if the lever is gritty, crooked, leaking, or will not return with no pressure on the gun.
Compare spray nozzle tips on Amazon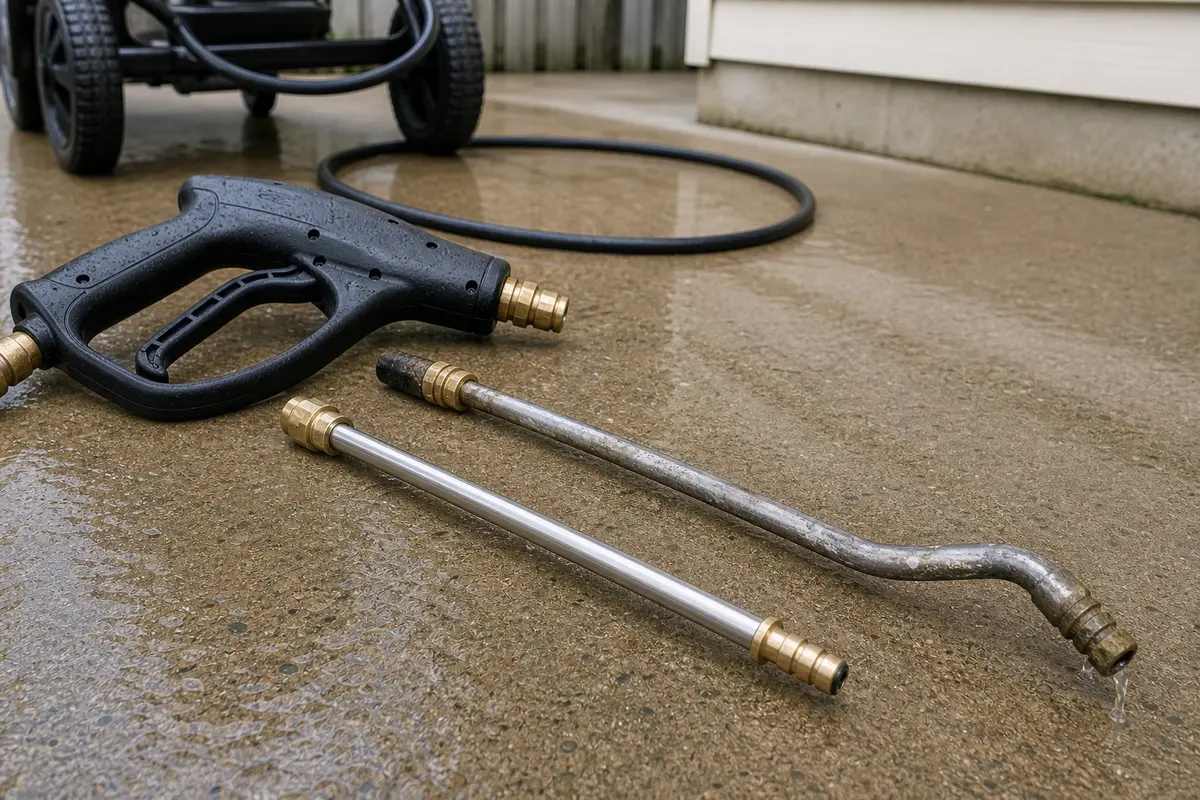
Helps when: The bare trigger gun passes water, but the wand end is bent, blocked, or leaking.
Skip it when: Skip it if the trigger gun itself binds, leaks at the body seam, or fails to shut spray off.
Compare spray wands on AmazonAs an Amazon Associate I earn from qualifying purchases. Repair Riot may earn a commission at no extra cost to you.
A good repair leaves the gun boring: it opens, closes, and bleeds pressure the same way every time. Anything less deserves another look before the washer goes back to work.
Most of the time the safety lock is engaged or pressure is trapped in the gun and hose. Shut the machine off, disconnect power or spark, remove the nozzle, and squeeze the trigger to bleed pressure before assuming the gun is broken.
Yes. A blocked spray tip can keep pressure loaded against the gun and make the trigger feel unusually hard or make spray stop after a short burst. Remove the tip and test flow before replacing the gun.
Not as a first move. Start by cleaning off grit and checking for cracks or binding. Random lubricants can attract more dirt and do not fix a cracked housing or failed internal spring.
Check the gun after the machine is off, pressure is bled, and the nozzle is removed. Replace it if the lever still binds, will not spring back, leaks at the body seam, or shows cracks around the pivot or lock.
If the trigger stays gritty, crooked, stuck, or leaks after you bleed pressure and remove the nozzle, start with the trigger gun. If the lever moves normally but the washer surges, loses pressure, smokes, or gets hard to pull start, stop treating it as a trigger-only problem and look deeper than the gun.
Pressure can stay trapped in the hose and gun after shutdown, especially with the nozzle still installed. Shut the unit off, turn the water off, point the wand safely down, remove the tip, and squeeze the trigger to bleed it.
Stop using the washer. A trigger gun that does not return or does not shut spray off is not a safe control anymore. Inspect for grit or damage, then replace the gun if it stays unreliable.
Only if the gun is meant to come apart, the maker sells the spring, and the housing is not cracked or leaking. If the trigger still binds or will not return, check the old gun and compare complete assemblies.
Match the hose connection, wand connection, pressure rating, flow range, and style of quick-connect or thread. Use the washer model and the old gun as references instead of buying by photo alone.
Repair Riot built this page around the first safe split: pressure-bound gun, blocked outlet, or damaged trigger assembly. The sources and related repair notes below shaped the safety boundary and kept pump-side repairs separate from trigger-gun checks.