
Attic ventilation repair

How to Replace Attic Ventilation Baffles

To replace attic ventilation baffles, remove the crushed, moldy, or missing baffles near the eaves, clear the soffit air path, then fasten new baffles between the rafters so insulation cannot block incoming air.

This is a good homeowner repair when baffles are damaged, falling down, or missing and insulation is packed tight against the roof deck at the eaves. The goal is simple: keep a clear air channel from the soffit vents into the attic.

Before you start: Match the replacement part to your exact attic ventilation before ordering.

Prepared by: Repair Riot Last updated: 2026-06-05 How we build and check guides

Safety first

  • Watch your footing at all times and stay on joists or stable walking boards, not the drywall ceiling.
  • Wear a dust mask, gloves, and eye protection when handling insulation and old attic materials.
  • Be careful around roofing nails that may protrude through the roof deck near the eaves.
  • Take breaks in hot weather since attic temperatures can rise quickly.

Tools you may need

Work light or headlamp tool

Work light or headlamp

Use it for: Attics are dim, and you need to see the rafter bays and fastener locations clearly.

Shop attic work lights

Tape measure tool

Tape measure

Use it for: Helps you check rafter spacing and cut baffles to length if needed.

Shop tape measures

Utility knife tool

Utility knife

Use it for: Useful for trimming foam or cardboard baffles for a clean fit.

Shop utility knives
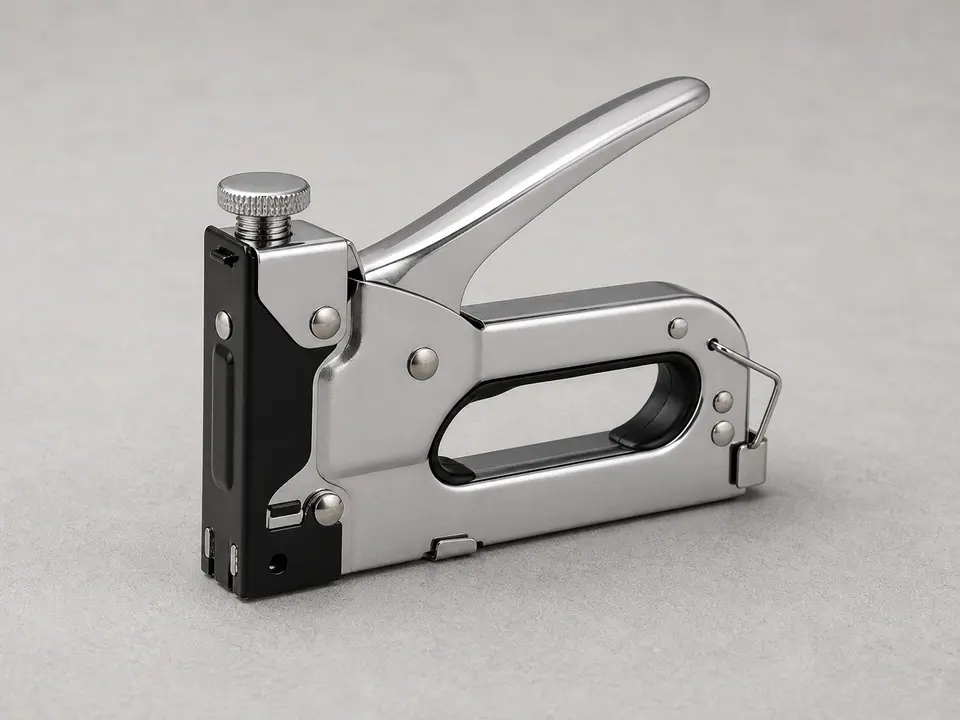
Staple gun tool

Staple gun

Use it for: Common way to fasten lightweight baffles to wood rafters.

Shop staple guns
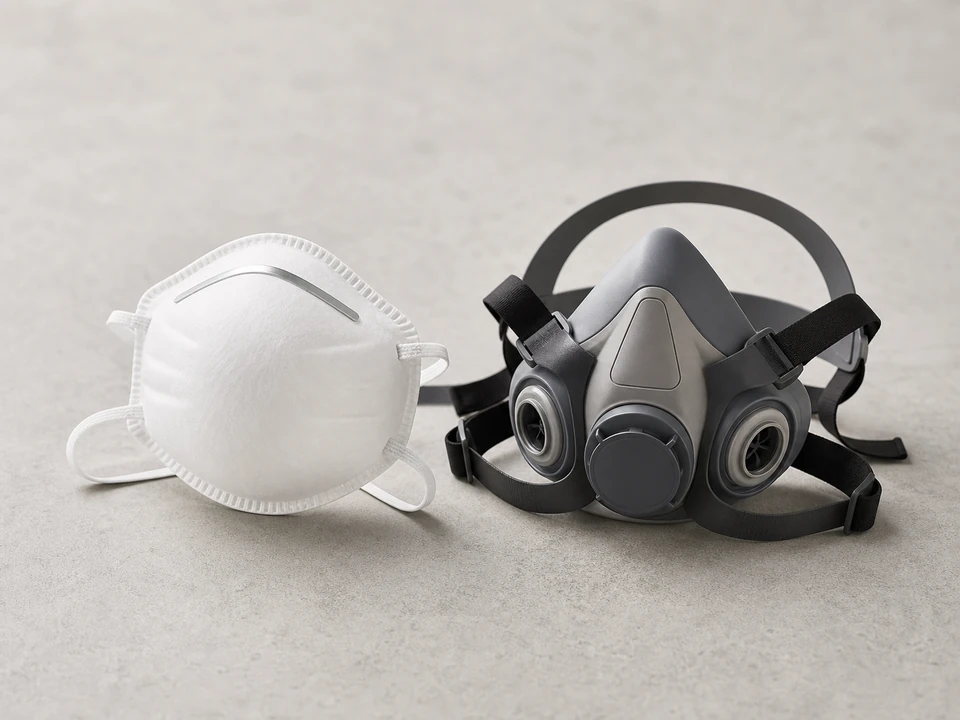
Dust mask or respirator tool

Dust mask or respirator

Use it for: Helps reduce exposure to attic dust, insulation fibers, and debris.

Shop dust masks

Work gloves tool

Work gloves

Use it for: Protects your hands from splinters, roofing nails, and rough framing.

Shop work gloves

As an Amazon Associate I earn from qualifying purchases. Repair Riot may earn a commission at no extra cost to you.

Step-by-step fix

Step 1: Make sure baffles are really the problem

  1. Go into the attic during daylight with a work light and look at the lower roof edges above the soffits.
  2. Check for missing baffles, crushed baffles, loose baffles, or insulation stuffed tight against the roof sheathing where outside air should enter.
  3. Look for signs the air path is blocked, such as damp insulation near the eaves, staining on the roof deck, or uneven attic temperatures.
  4. Count how many rafter bays need repair so you can buy enough replacement pieces.

If it works: You found damaged, missing, or blocked baffles and can point to the exact bays that need replacement.

If it doesn’t: If the baffles are intact and the air path is already open, the moisture or heat problem is likely coming from another ventilation or air-leak issue.

Stop if:
  • The roof sheathing is soft, badly moldy, or actively leaking.
  • You see widespread structural damage, heavy rot, or unsafe footing in the attic.
  • The soffit area is inaccessible without removing finished materials or working near exposed wiring you cannot safely avoid.

Step 2: Set up the attic so you can work safely

  1. Wear gloves, a dust mask, and eye protection before moving insulation or old baffles.
  2. Place boards or kneeling planks across ceiling joists if needed so you do not step through the ceiling below.
  3. Bring only the tools and replacement baffles you need into the attic to keep the work area less cluttered.
  4. Work when the attic is as cool as practical, and stop for breaks if heat builds up.

If it works: You have a stable, well-lit path to the eave area and can reach the damaged baffles without overreaching.

If it doesn’t: If you cannot reach the eaves safely or cannot move around without risking a ceiling fall, this is a good point to call a pro.

Stop if:
  • The attic is dangerously hot, cramped, or unstable to work in safely.
  • You cannot stay on framing members or safe walking boards while reaching the repair area.

Step 3: Remove the old baffles and clear the air channel

  1. Pull back insulation gently from the eave area so you can expose the old baffles and the soffit intake path.
  2. Remove staples or fasteners holding the damaged baffles in place, then take out the old pieces.
  3. Clear away loose insulation, debris, nests, or dust that are blocking the path from the soffit vents into the attic.
  4. Leave enough space along the roof deck for air to move upward once the new baffles are installed.

If it works: The old baffles are out and each repair bay has a visible, open path from the soffit area into the attic.

If it doesn’t: If the soffit side still seems blocked after cleanup, check from outside for clogged or covered soffit vents before installing new baffles.

Stop if:
  • You uncover active pest activity, heavy droppings, or contaminated insulation that should be handled with proper cleanup procedures.
  • You find hidden water damage or active leaks behind the old baffles.

Step 4: Fit the new attic ventilation baffles

  1. Measure the width of the rafter bay and compare it to the new baffles before fastening anything.
  2. Trim the baffles only if needed so they fit between the rafters without folding or collapsing.
  3. Slide each baffle down toward the soffit so it creates a chute that keeps insulation off the roof deck.
  4. Make sure the lower end lines up with the soffit intake area and the upper end extends far enough into the attic to stay above the insulation level.

If it works: Each new baffle sits flat between the rafters and forms a clear channel from the soffit into the attic.

If it doesn’t: If the baffles will not sit flat or keep collapsing, recheck the bay width and choose a style that better matches your framing spacing.

Stop if:
  • The framing is irregular enough that the replacement baffles cannot be secured properly without custom carpentry or vent changes.

Step 5: Fasten the baffles and reset the insulation

  1. Staple or otherwise fasten the sides of each baffle to the rafters so it stays in place and does not sag into the air channel.
  2. Check that the center of the baffle remains open after fastening and that no staple placement crushes it shut.
  3. Move the insulation back into place, but keep it behind the baffle and out of the airflow path.
  4. Repeat the same installation in each damaged or missing bay so the repaired section is consistent.

If it works: The baffles are secure, the air channels stay open, and the insulation no longer touches the roof deck at the eaves.

If it doesn’t: If insulation keeps falling into the chute, pull it back again and make sure the baffle extends high enough to hold the insulation away from the roof sheathing.

Stop if:
  • The insulation is wet, moldy, or badly compressed and needs broader replacement rather than simple repositioning.

Step 6: Check that the repair holds in real conditions

  1. Look along the repaired eave area and confirm you can see a continuous path for air to move from the soffit area into the attic.
  2. On a breezy day or with daylight at the soffits, look for signs that outside air can actually reach the new channels.
  3. After the next stretch of humid, cold, or hot weather, recheck the area for fresh dampness, frost, or insulation slumping back into the openings.
  4. Make sure every repaired bay still has the baffle attached firmly and the chute still open.

If it works: The baffles stay in place, the soffit air path remains open, and the attic shows fewer signs of trapped moisture or heat at the eaves.

If it doesn’t: If moisture, frost, or overheating continues even with open baffles, the attic likely has a larger ventilation or air-sealing problem that needs a broader diagnosis.

Stop if:
  • Condensation, mold, or roof deck staining continues to spread after the baffles are replaced and the air path is open.

Replacement Parts

As an Amazon Associate I earn from qualifying purchases. Repair Riot may earn a commission at no extra cost to you.

Verify the repair

  • The new baffles are firmly attached and not sagging or crushed.
  • Insulation is held back so it cannot block the soffit-to-attic air path.
  • You can trace a clear ventilation channel from the soffit area into the attic.
  • The repaired area stays drier and more stable after normal weather conditions.

FAQ

How do I know attic ventilation baffles need replacement instead of just repositioning?

If the baffles are torn, crushed, moldy, falling down, or missing, replacement makes more sense. If they are intact and only covered by insulation, you may only need to pull the insulation back and reopen the channel.

Can I replace only a few attic ventilation baffles?

Yes. You can replace only the damaged or missing ones as long as the surrounding bays still have a clear air path and the existing baffles are in good shape.

What do attic ventilation baffles actually do?

They keep insulation from blocking the intake air coming from the soffit vents. That airflow helps the attic shed moisture and excess heat.

Should insulation touch the roof deck near the eaves?

Usually no. Near the soffits, insulation packed against the roof sheathing can block intake airflow. The baffle creates the space needed for ventilation.

What if I replace the baffles and still get attic condensation?

That usually means the problem is bigger than the baffles alone. You may also have blocked soffit vents, weak exhaust ventilation, or warm indoor air leaking into the attic.