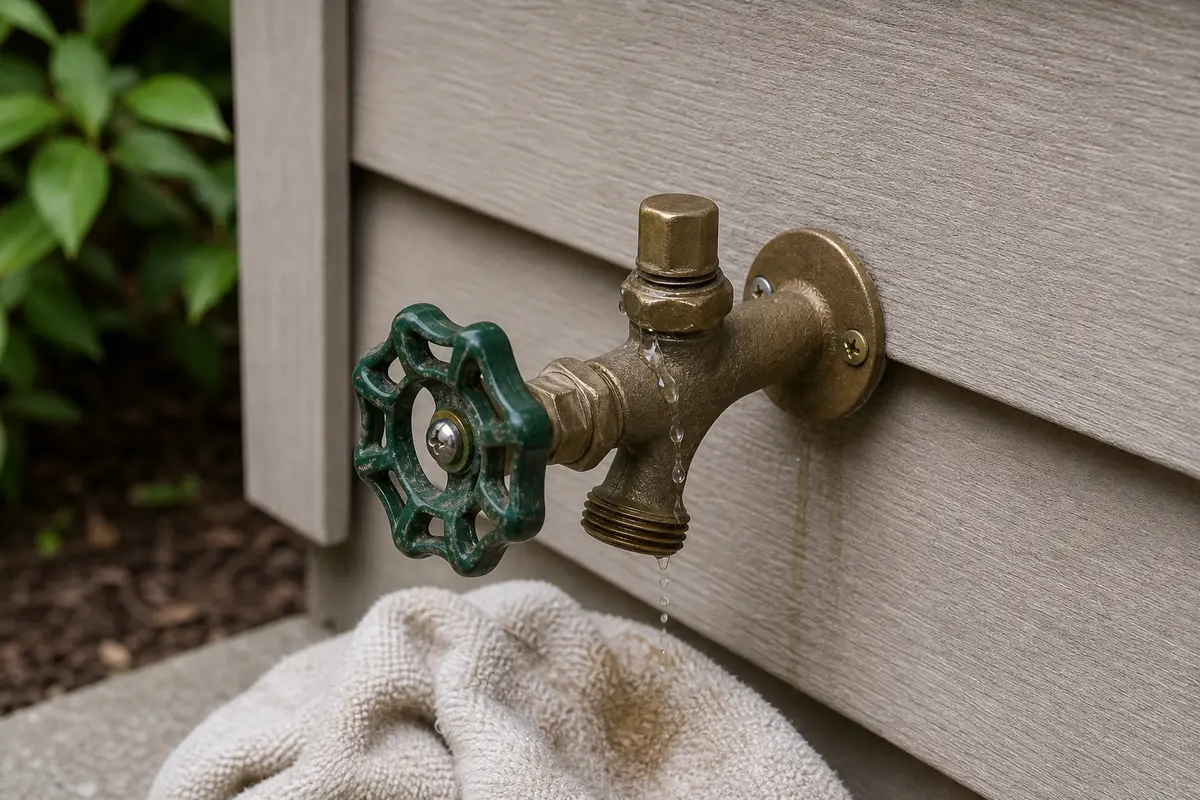
Direct answer: If your hose bib leaks around the handle or stem, first try tightening the packing nut slightly. If that does not stop the leak, remove the handle hardware, back off the packing nut, and install new hose bib stem packing before retightening and testing.
This repair is usually straightforward and does not require replacing the whole faucet. The key is making sure the leak is coming from the stem area, not from a cracked body, split solder joint, or failed vacuum breaker.
Before you start: Confirm the leak is around the handle stem before buying packing. Stop if the hose bib body is cracked, the faucet twists in the wall, water appears behind the siding, or you cannot shut off the water well enough to open the stem area.
Last reviewed: 2026-06-15
Make sure this is a packing repair
A packing repair is worth trying when the faucet body is sound and the leak follows the stem. Do not use the packing nut to hide a cracked hose bib or a loose pipe in the wall.
This page fits
This page fits when: Water seeps from just below the handle or around the packing nut while the hose bib is open, and the handle still turns normally.
Check something else when: Dry the faucet, run it with no hose attached, and watch the stem area. If the top vacuum breaker or hose threads leak instead, use that repair path.
Try tightening first
This page fits when: The packing nut moves with a controlled one-eighth to one-quarter turn and the handle does not bind.
Check something else when: If a small snugging stops the leak, you may not need new packing yet. If the handle gets stiff before the leak stops, repack the stem instead of forcing the nut tighter.
Stop for bigger damage
This page fits when: The hose bib stays solid at the wall, the body is not cracked, and the water supply can be shut off before the stem is opened.
Check something else when: Stop if the faucet body twists, the packing nut feels ready to snap, or water appears behind the siding. That can turn into a faucet replacement or plumbing repair.
Confirm the stem leak before repacking
Stem packing only fixes water seeping around the handle or packing nut. If the leak starts at the spout, vacuum breaker, wall flange, or inside the wall, follow that failure point instead.
Look for water at the handle stem while the faucet is open. A spout drip with the faucet off usually points to a washer or valve-seat problem instead.After the water is off, compare the old packing area with the new packing material. The nut should thread back on by hand before you tighten it.
Safety first
Shut off the water supply before removing the packing nut or handle hardware beyond a minor snugging adjustment.
Use controlled pressure on the wrench so you do not twist the faucet body or hidden supply pipe.
If the faucet is old and corroded, expect brittle parts and stop before forcing anything that may snap.
Keep your work area dry so you can see the leak source clearly and avoid slipping on wet surfaces.
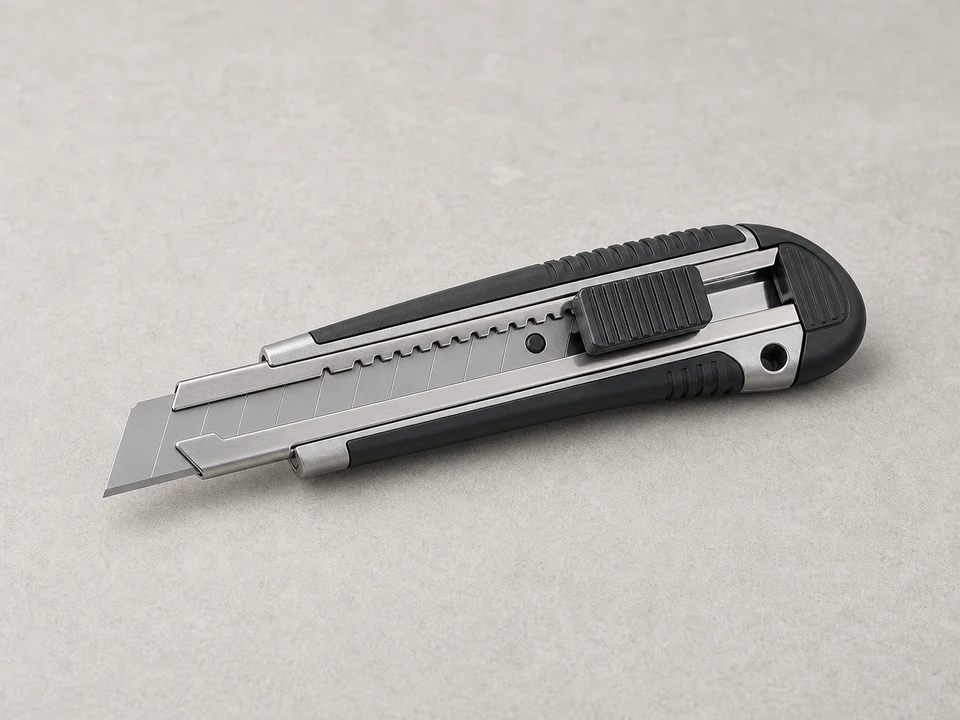
Tools you may need
Adjustable wrench
Use it for: To hold and turn the packing nut without rounding it off.
As an Amazon Associate I earn from qualifying purchases. Repair Riot may earn a commission at no extra cost to you.
Step-by-step fix
Step 1: Confirm the stem packing is the problem
Turn the hose bib on and watch closely where the water appears.
Look for water seeping from just below the handle or around the stem while the faucet is open.
Wipe the faucet dry, then check again to make sure the leak is not coming from the spout, hose connection, vacuum breaker, or the wall behind the faucet.
If the leak only shows around the handle area, this is the right repair to try.
If it works: You have confirmed the leak is coming from the stem area around the handle.
If it doesn’t: If water is dripping from the spout with the faucet off, the washer or valve seat is more likely the issue. If water is coming from the wall, body, or a cracked fitting, plan for a different repair.
Stop if:
The faucet body is cracked or split.
Water is leaking from inside the wall or siding.
The faucet is loose enough that the supply piping may be moving behind the wall.
Step 2: Set up the faucet and try a small packing nut adjustment first
Remove any hose, splitter, or timer from the spout so the faucet is not under extra strain.
Dry the area around the handle and packing nut.
Use the adjustable wrench to turn the packing nut clockwise about one-eighth to one-quarter turn.
Do not crank down hard. The goal is to compress the existing packing slightly, not crush the stem or freeze the handle.
Open the faucet and check the stem area again.
If it works: The leak slows or stops and the handle still turns with normal resistance.
If it doesn’t: If the leak continues or the handle becomes too stiff, move on to replacing the packing.
Stop if:
The packing nut will not move and feels likely to snap.
The stem or faucet body twists with the nut instead of staying solid.
Step 3: Shut off water and open the stem area
Shut off the water supply feeding the hose bib if you have a local shutoff. If not, shut off the main water supply.
Open the hose bib to relieve pressure and drain any remaining water.
Remove the handle screw and lift off the handle.
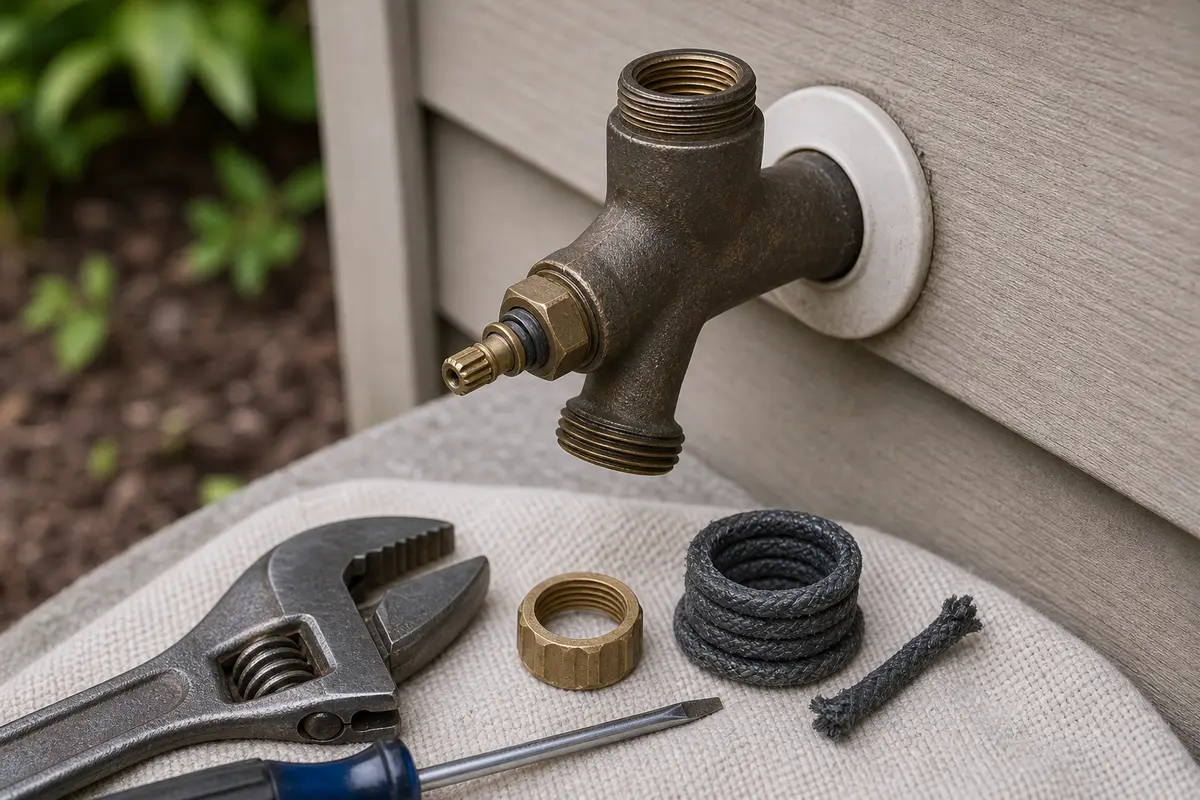
Back off the packing nut carefully and slide it up the stem if the design allows, or remove it fully if it comes free.
Use pliers or a small pick to remove the old packing material from around the stem and inside the nut area.
If it works: The old packing is out and the stem area is clean enough for new material.
If it doesn’t: If the packing is stubborn, work it out in small pieces rather than digging aggressively into the stem or nut.
Stop if:
The stem threads are badly damaged or stripped.
The packing nut is cracked.
You cannot isolate the water supply well enough to work on the faucet safely.
Step 4: Install new stem packing
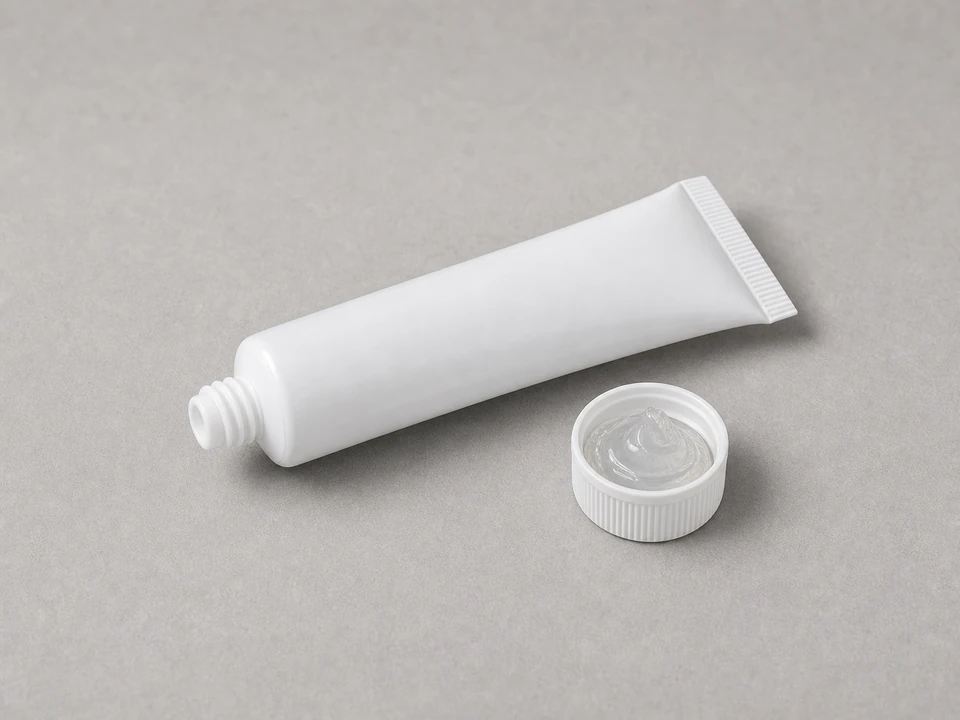
Wrap the new hose bib stem packing around the stem in the same area the old packing occupied, or place the replacement packing into the nut as designed.
Match the new packing thickness to the space under the packing nut. A thin stem needs a smaller wrap; a worn, roomy nut may need another partial wrap.
Use only enough packing to fill the space neatly. Too much packing can make the handle bind or prevent the nut from threading correctly.
If you are using packing string, wrap it evenly in the direction that helps it stay in place as the nut tightens, then trim the tail cleanly so it cannot bunch under the nut.
Apply a very light smear of plumber's grease to the stem threads if they are dry or rough, keeping grease off sealing surfaces as much as possible.
Thread the packing nut back on by hand first to confirm the brass threads start squarely and the packing is not blocking the first thread.
If it works: The new packing is seated neatly and the packing nut threads on smoothly by hand.
If it doesn’t: When the nut will not start easily, remove it and reposition the packing so it is not bunched up or blocking the threads.
Stop if:
The nut cross-threads or will not seat squarely.
The stem is bent enough that the packing cannot sit evenly.
Step 5: Reassemble and tighten just enough to seal
Tighten the packing nut until it is snug, then add a small additional turn with the wrench.
Reinstall the handle and screw.
Turn the water supply back on slowly.
Open and close the hose bib several times to settle the packing and feel for handle drag.
Watch the stem area while the faucet is running, then shut it off and check the packing nut again after the pressure drops.
If you still see a faint bead of water, tighten only another one-eighth turn and retest before deciding the stem needs a fuller rebuild.
If it works: The faucet operates normally and the stem area stays dry or nearly dry with no active seepage.
If it doesn’t: A handle that gets stiff before the seep stops usually means the stem, nut, or packing size is wrong, not that the nut needs more force.
Stop if:
The handle becomes very hard to turn after minor tightening.
Water starts leaking from a different part of the faucet body or supply connection.
Step 6: Verify the repair holds in real use
Reconnect a hose only after the stem area stays dry during a short test.
Run water for a few minutes with the faucet partly open and fully open.
Shut the faucet off, then check again around the handle after a few minutes.
Use the faucet normally over the next day or two and recheck for seepage around the packing nut.
If it works: The hose bib stays dry around the handle during normal use, and the handle turns smoothly without dripping from the stem.
If it doesn’t: If the leak returns quickly, the packing may be the wrong size, the stem may be worn, or the faucet may need a more complete rebuild.
Stop if:
The leak worsens after repacking.
The faucet body, stem, or mounting becomes loose or damaged during use.
Match the packing style and stem space before ordering. Older hose bibs often use graphite packing string, while some frost free models need a brand specific stem or packing kit.
As an Amazon Associate I earn from qualifying purchases. Repair Riot may earn a commission at no extra cost to you.
Verify the repair
No water seeps from around the handle or stem while the faucet is open.
The handle turns smoothly and is not overly stiff after tightening the packing nut.
The faucet remains dry around the stem after being turned off and left for several minutes.
Normal hose use does not bring the leak back around the packing area.
FAQ
Should I replace the stem packing or tighten the nut first?
Try a small packing-nut adjustment first if the handle still turns normally and the faucet body is solid. Replace the packing when a light adjustment does not stop the seep or when the handle has to be over-tightened to slow the leak.
What does a packing nut do on a hose bib?
The packing nut compresses packing material around the valve stem. That packing seals water in while still letting the handle turn.
Why does the hose bib only leak when the faucet is on?
That usually points to worn or loose stem packing. When the valve is open, water is present around the stem area and can seep past weak packing.
Can I use any packing material?
Use packing intended for faucet or valve stem service and match the size and style as closely as you can. Packing that is too thick, too thin, or not meant for this use may not seal well.
What if the faucet still drips from the spout after I repack the stem?
That is usually a different problem. A spout drip with the faucet off often points to a worn washer, damaged stem, or valve seat issue rather than stem packing.
Sources and reference notes
Repair Riot keeps this hose-bib packing guide focused on handle-stem leaks, controlled packing-nut adjustment, and stop points for cracked faucet bodies or hidden wall leaks.